
How to: Setup and Use Tags
What are Tags?
Tags are a great way to group orders based on how you do business. They can also be used to “flag” important information on an order. Tags are searchable on the Order Screen.

Tags have a distinct name and a color that can be used for categories or flagging important information.
Setting up Tags for use:
Permissions need to be granted for the user.
Tags are generally not locked down in most systems. But some lock downs are available to you.
First, go to the Access Roles page: Settings (Gear Icon) - Access Roles

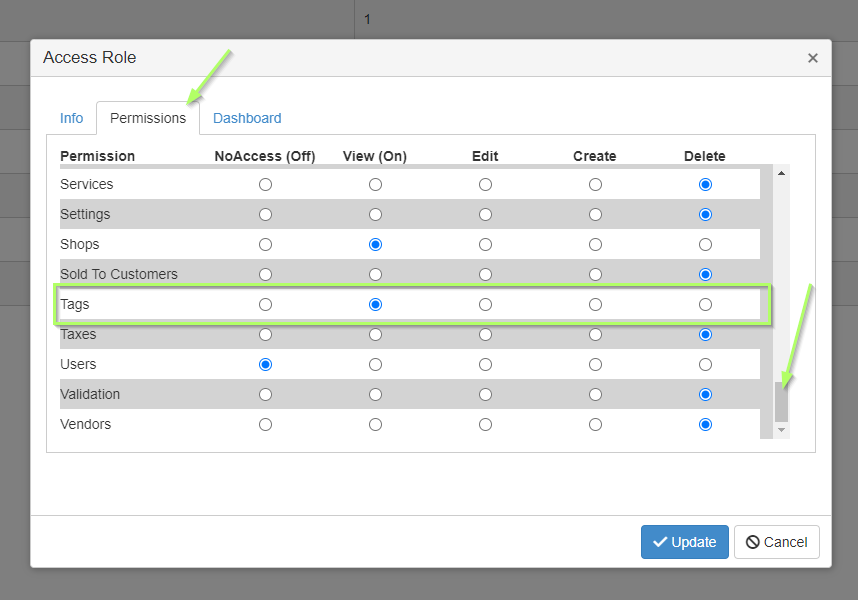
In the editor pop-up, click the Permissions tab and scroll down until you see the Tags permission. Click on the access level for that role. If it is a new role, you will need to assign it to a user, but typically you would be modifying a role that already exists.
Next, go to the Tags Management page.
Tags Management Page:
This is where you can create, edit, inactivate, or delete tags.
The user must have access to be able to utilize this functionality.
As you can see there is basic information available for all the tags you have in the system in one place. This is incredibly useful if you want all tags for flagging orders to be red. Or any flags having to do with billing to be green, or something similar. You can also see how many orders are attached to each tag. The information about active, inactive, and deleting tags can be found here for reference.


You can sort by column to see which ones are the same color or which ones are the least used.
Creation:
You can create a tag from the Tag Management page by clicking the ‘Add Tag’ button or by clicking the ‘+' plus icon next to the tags label on orders. Editing and deleting tags can only be done from the Tags Management page. But you can quickly get there from any order by clicking the pop-out icon that is labeled 'New Record’. This is because similar dropdowns only have this option for adding a new record.
From the Tags Management Screen:

On the tag management page, create a new tag by clicking the ‘+ Add Tag’ button.

The Edit Tag modal pops up with nothing in it, but defaults. Simply type the name of the tag, and if desired, change the color. Then click the ‘Update’ Button.

If there is already a tag with that name, this error will be shown.
From the Order Screen:


To create a tag from an order (without leaving the order) click on the '+' plus sign by the label. The above pop-up will show. Creating a tag this way is quicker and adds it to the input on the order to be saved with the rest of the order information. You can just type in a tag name and update the color later, if you choose. Or do both when creating it.

Attaching to an Order:
Tags are utilized as markers for orders. This explains how to attach them to an order. Please be aware the tags are not currently on credit memos. This will probably be added in the future.

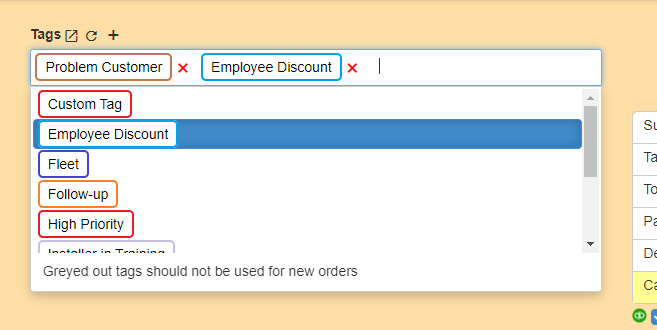
A list of tags (both active and inactive will be shown). Typically an inactive tag would not be added to an order. But…. since occasionally things are accidentally deleted, you can add it back on.


 Removing from an order:
 Removing from an order:
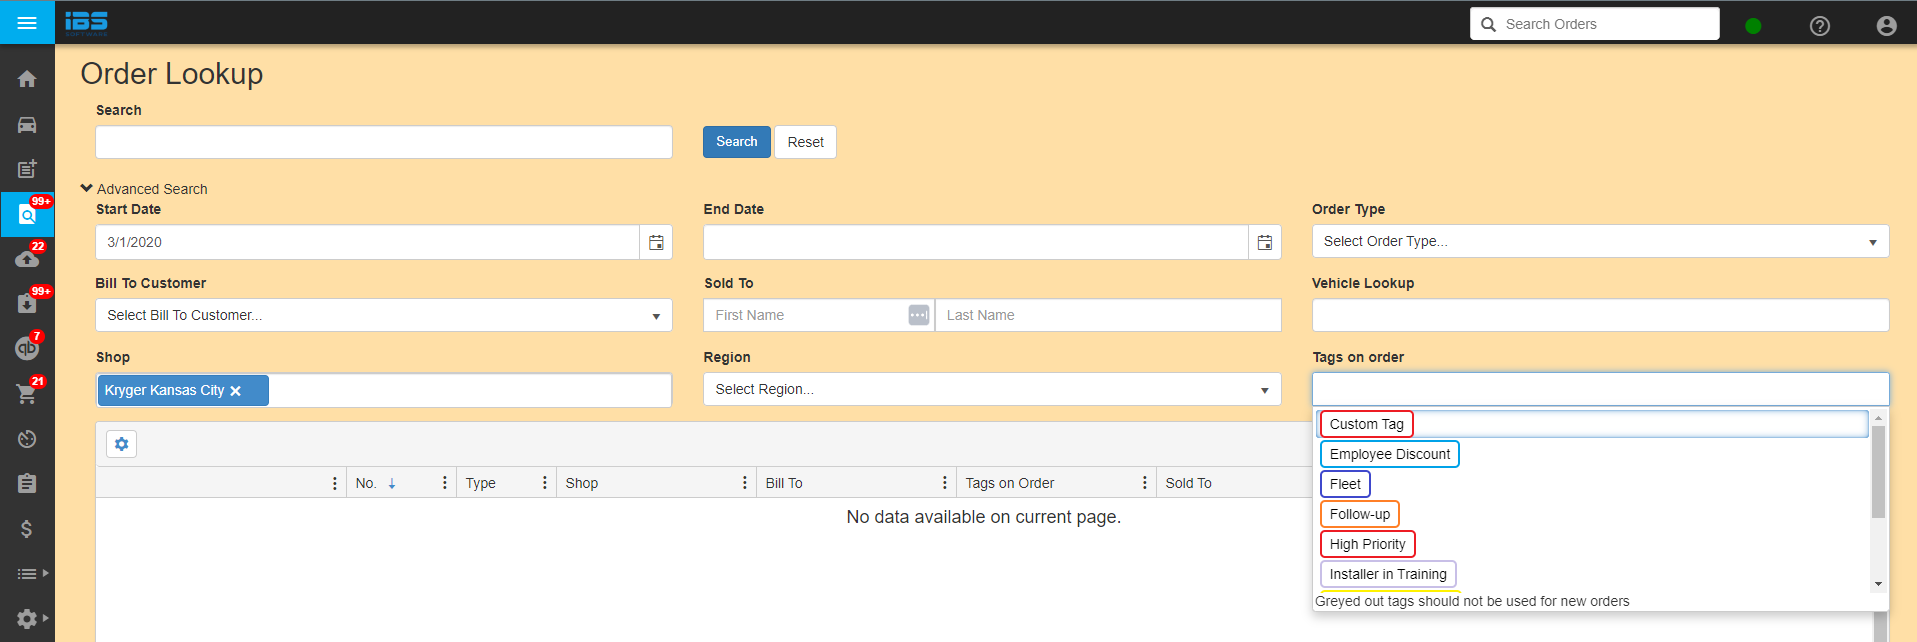
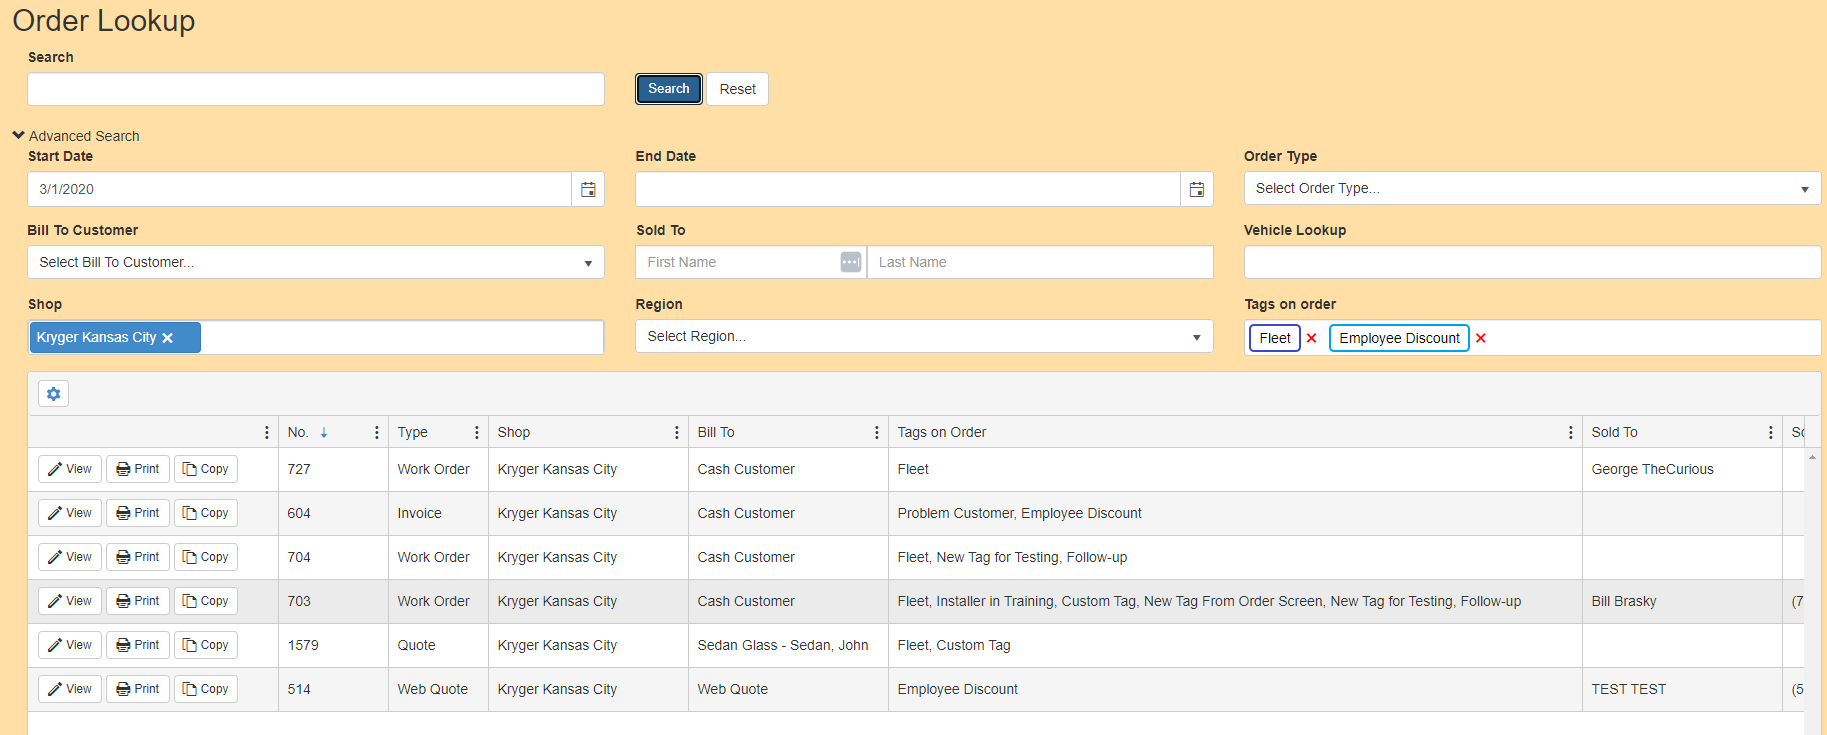
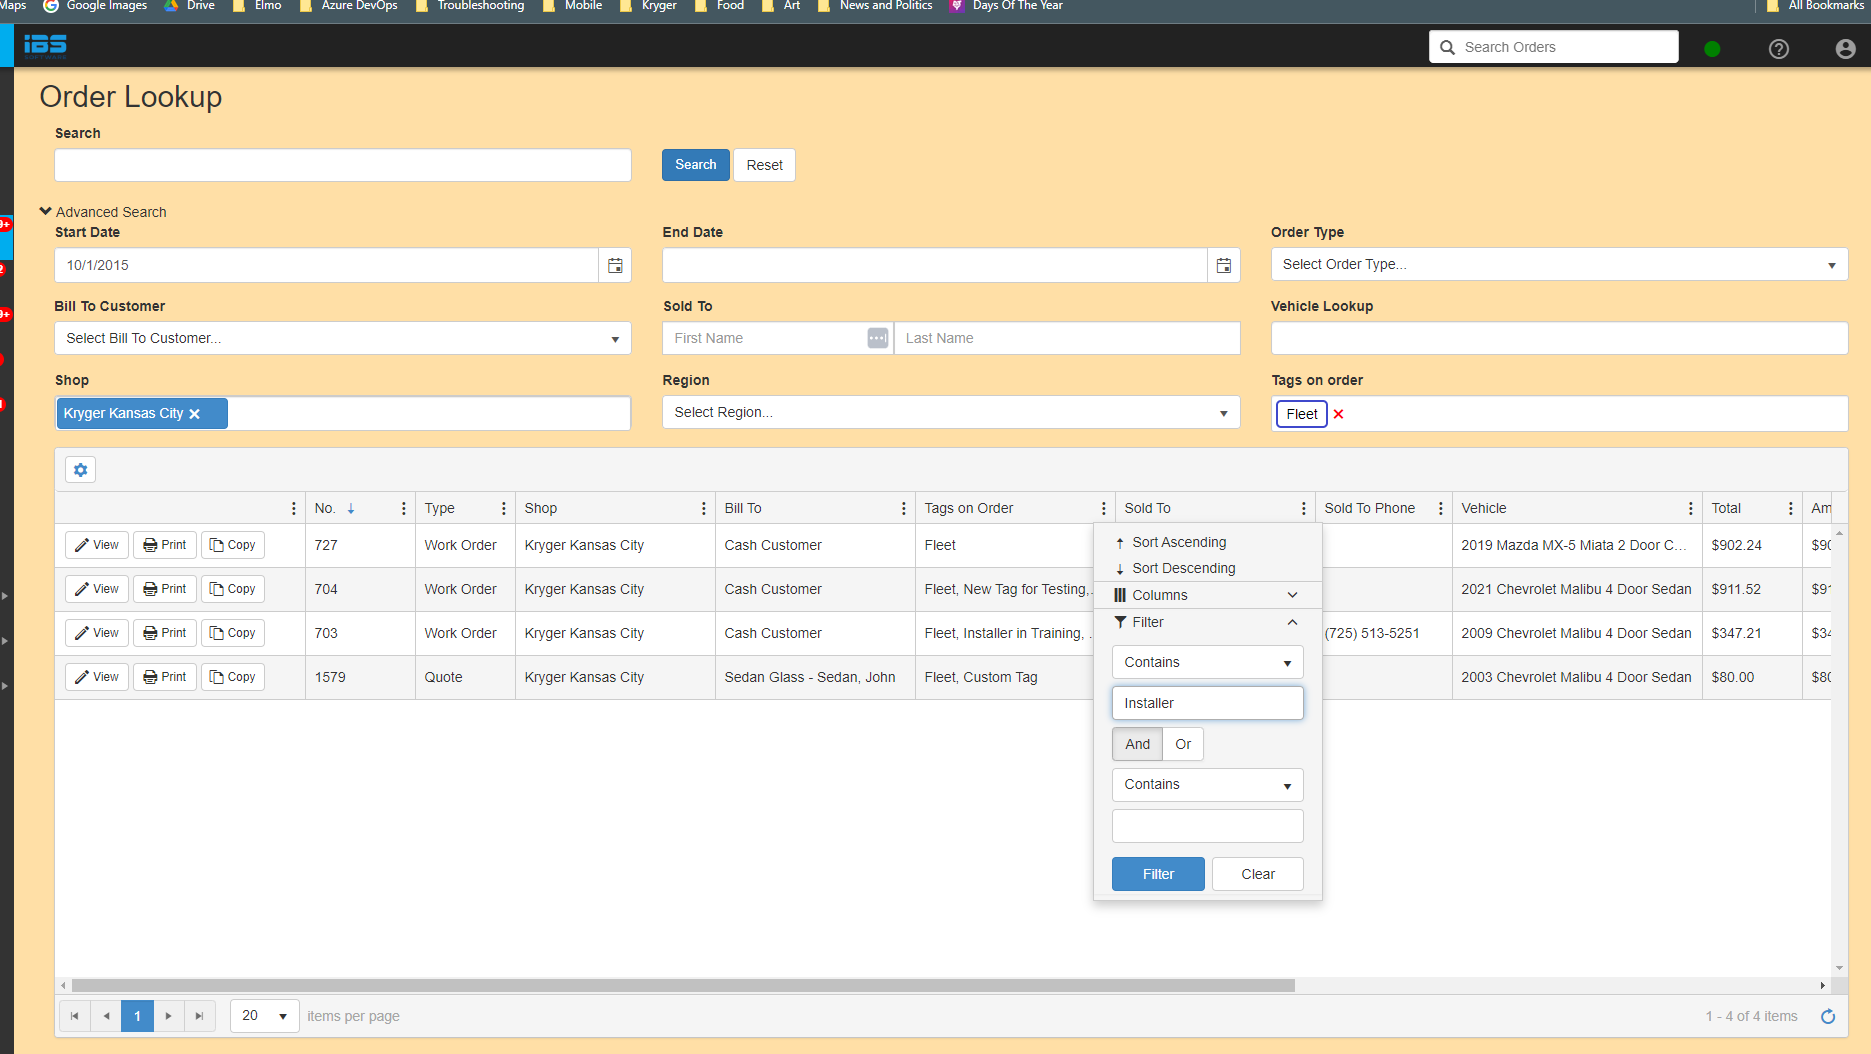
If you want to find an order with two (or three) specific tags, say “Fleet” and “Installer in Training”, this typically would use the AND qualifier. Since qualifiers are not used on multiselects, this is how you do it. Put only one of the tags in the multiselect filter. Make sure there is a Start date and click Search. After the search on that one tag, filter the column based on the second tag. The grid will then show only those orders with both tags.

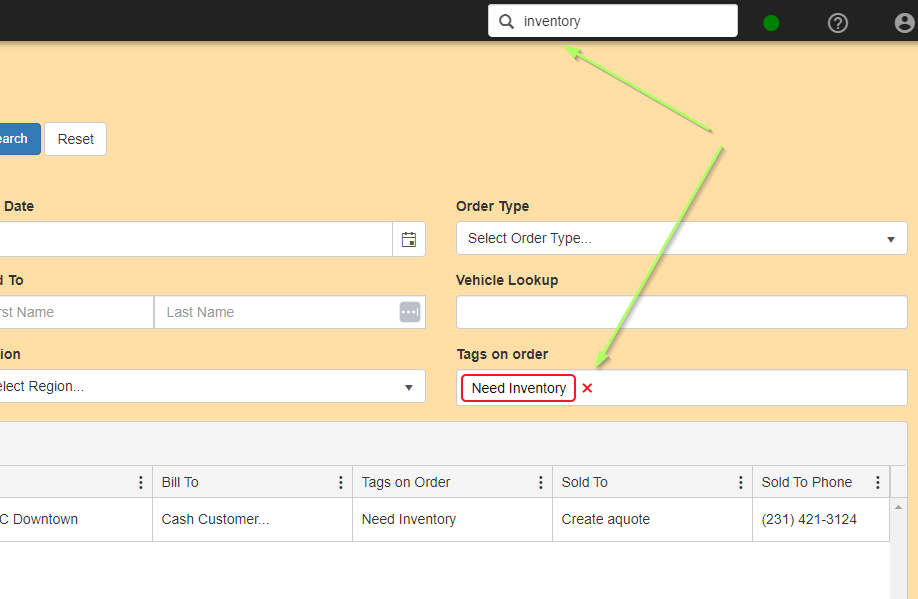
Searching by tag in Omni-search/Global search box:
Type the name of the tag in the ‘Search Orders” box at the top of the page. The search that is done is based on text. This means that if you have a similar word as a business name or in an address, it would also show. This is why I suggest to not use only numbers as a tag name. It makes it harder to use the omni-search for a tag. This is because dates, order numbers, and similar will show up in the returned information. Overall, searching by the Order Lookup page is best. Also, the data for the omni search updates periodically. It may take up to 10 minutes to show in the search. If it does not show, let us know.
Tips/Notes:
- Make a list of what tags will and will not be used so that users can be consistent.
- Group similar tags by color to make them easy to notice and understand. Otherwise, don’t use colors unless it is something important to flag.
- The tag creation keeps there from being two tags of the same name. But if similar words or a different spelling or spacing are used, it will be a separate tag. This can get confusing for users. Keep tag names distinct for their purpose.
- Don’t create a tag for use on a single order that cannot be reused in the future. Otherwise, you end up with a cluttered tag list any time someone goes to tag an item.
- Don’t use numbers only as a tag name such as ‘3’ instead use numbers alongside a descriptor as in ‘Priority 3’ or ‘30 days late’
- Don’t delete a tag until it has been inactive for several days or longer. That way you have less of a chance of removing information that someone else was using. It is better for them to see it has been changed to inactive and ask if anyone is still using it before it gets deleted.
- Check how many orders are attached to a tag before deleting it. Also search for that tag on the Order Lookup page before deleting it. That way you can make sure the tag is no longer relevant for future business.
- Tags are not currently shown on any printed statement or report. This makes it useful for quick, important, and internal communication. It may be added to reports in the future, as requested and time allows.